How to Use Coloured Pencils on Drafting Film
How to Use Coloured Pencils on Drafting Film
Drafting film is a fascinating surface that’s become increasingly popular with coloured pencil artists and for good reason. Originally designed for technical drawing by draftsmen and architects, it offers a clean, smooth finish that's both unique and versatile when used with coloured pencils.
So, what exactly is drafting film? At its core, it’s a 100% polyester surface that is archival* and incredibly durable. It has a semi-transparent appearance, similar to tracing paper, with slightly more tooth (fine texture) on the surface. Although it doesn't tear easily, it should still be handled with care. One of the few drawbacks is that if it creases, the damage is permanent. Even a small bent corner will leave a visible mark that can’t be removed.
Popular brands include:
Grafix* double-sided matte (archival), Grafix Dura-Lar and Polydraw
Because of its smooth surface, drafting film needs to be kept clean while working. It's especially sensitive to fingerprints and smudges from the palm or wrist. To avoid marks, many artists use a cotton glove or a hand bridge to lift their hand slightly off the surface as they draw. Drafting film is sensitive to the surface it rests on, so consider using a smooth underlay rather than a textured one.
While the surface feels smooth, drafting film has just enough tooth to hold coloured pencil well. In fact, the pigment sits right on top, making colours appear more vibrant and intense. You'll often find you need fewer layers to achieve rich, saturated colour compared to working on paper, which can significantly reduce the time spent on a piece. Because of this quality, you must plan your colour layers more strategically than you do for blending and layering on paper.
Another unique feature is its translucency. Due to the slightly transparent quality of drafting film, any background placed behind it will influence the appearance of your drawing. Bright backing papers can enhance vibrancy, while darker or muted tones can soften and desaturate the colours. Due to its semi-opaque nature, the film will slightly mute background colours placed underneath it.
In this example I have used Pan Pastels on hot-pressed watercolour paper as an underlay for the background and left a silhouette of white paper for the dog to preserve his colours. I made the background colours much more vibrant due to the top layer of drafting film muting them down.


Polychromos on Grafix double-sided matte drafting film with Pan Pastels on watercolour paper underlay
This gives you creative flexibility, but it’s important to plan accordingly. If you’re using a double-matte version, which I highly recommend, you can draw on both sides of the film. This opens up exciting possibilities for creating depth or adding soft background tones without disturbing the detail on the front. Pan Pastels work great on the reverse side for a soft, muted background.
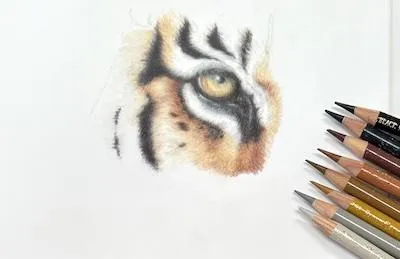
One major advantage of drafting film is that it’s particularly well-suited for creating realistic textures like fur. The surface responds beautifully to layering, and excess pigment can be lifted easily using an eraser or a Slice tool. The Slice Tool is a ceramic packing knife that can remove the coloured pencil with a gentle scraping action without damaging the film. It is ideal for creating wispy fur and whiskers. A great advantage when using drafting film.
Here is a video to demonstrate using the Slice tool on drafting film: How to use the slice tool on drafting film

Drafting film requires a slightly different approach to layering and planning, but once you get used to it, it can be an incredibly rewarding surface. Whether you're aiming for fine detail, dramatic contrasts, or soft backgrounds, it offers a wide range of creative possibilities for coloured pencil work.
If you haven’t tried drafting film yet, it’s well worth exploring. With a few adjustments to your technique, it can transform the way you work with coloured pencils, and open up an entirely new dimension in your artwork.
Here is a summary of some tips and techniques for using coloured pencil on drafting film:
Tools You’ll Need
Matte drafting film (double-sided)
Key Techniques for Drawing on Drafting Film
1.Use a Light Touch
Drafting film doesn't grab pigment the same way paper does. Use light pressure and let the layers build gradually. Heavy pressure will just push the pigment around rather than help it stick. Think of it like gently stroking glass, not colouring on paper.
2. Layer Mindfully
Drafting film holds fewer layers than paper, but if you are strategic, you can still blend beautifully with just 2–4 layers. You will need to plan your colour mixing differently from how you would on paper.
Try this approach:
Polychromos work beautifully for layering, they are harder and offer great control.
3. Work on Both Sides for More Depth
One of the best features of drafting film is that it’s translucent. If you use the double-sided matte surface, you can draw on both sides for added depth.
Use this technique to:
Tip: Avoid Burnishing
Burnishing (pressing hard to blend colours) doesn’t work well on drafting film. It may cause the pigment to slide off or create a waxy mess.
Solvent blending is not recommended — the surface doesn’t absorb liquid and it may cause warping.
4. Backgrounds
Drafting film allows you to create a stunning background for your coloured pencil subject.
Pan Pastels work great on the reverse side for a soft, muted background
Try a toned paper for a full colour behind your subject
Use a separate sheet with a background done in another medium while isolating your subject
Watch this short video here: Using Pan Pastels as a background with drafting film
5. Keep It Clean
Fingerprints and smudges will show through, especially on lighter areas. Keep a clean sheet of paper under your hand while working, and use a soft brush to sweep away crumbs. Avoid creases at all costs; the crease cannot be removed once the film is creased.
6. Erasing
Drafting film is very forgiving in this regard, and most mistakes can be erased using a vinyl eraser with a gentle approach. Consider a Tombow Mono eraser for those smaller areas.
Display and Finishing Tips
Avoid direct contact with glass; use a spacer in your frame to protect the surface.
Spray fixatives can be unpredictable on drafting film. If you choose to use one, test it on a scrap piece first! My advice is not to use fixatives, but rather to store your artwork safely or frame it.
Here is a video demonstrating how to frame drafting film: How to Frame Drafting Film
Working on drafting film might feel strange at first, but once you get the hang of it, it opens up a world of new textures, techniques, and depth in your coloured pencil artwork.
It is a brilliant surface for animal portraits as you can achieve crisp detail, soft, wispy fur, stunning depth and dimension and awesome backgrounds.
Why not give it a try on your next drawing? If you would like to learn more about drafting film and draw along with some easy tutorials, I have an online course you can purchase here: