How to Choose the Right Photo Reference for Your Artwork
How to Choose the Right Photo Reference for Your Artwork
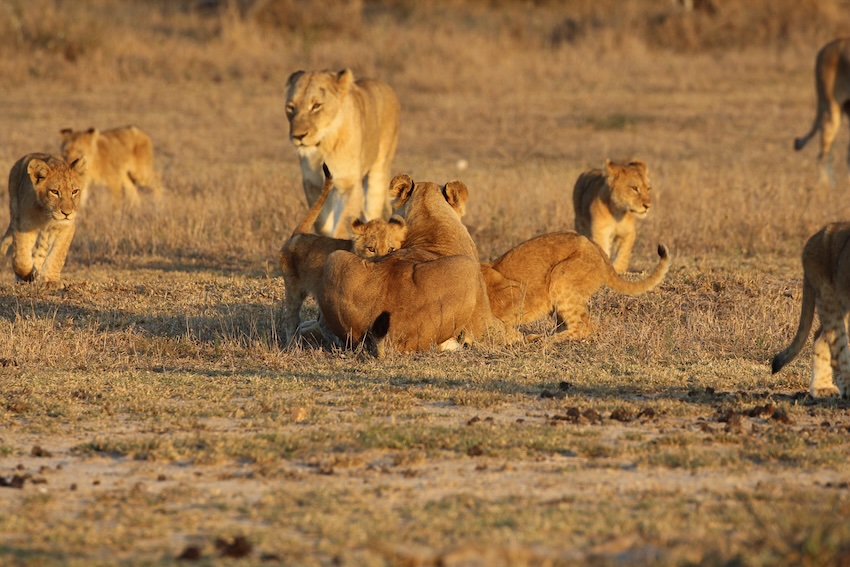
Just after sunrise on safari in South Africa, five lionesses walked back through the long golden grass after a night away hunting. Their cubs had been waiting, and the moment they saw their mothers, they came running out to greet them, tails in the air, tumbling over each other with pure joy. The low morning light turned everything to gold, and I took photo after photo, hardly daring to breathe.
When I got home and went through those photos, one stood out. Not because it was a perfect picture, because it wasn't! Lions were everywhere, cubs coming and going, and a sweep of grass and dirt filled the foreground. But tucked in the middle of all that busy, happy chaos was a quiet moment between a lioness and her cub, the cub peeking over her back with those big eyes, completely content to be close to her again.
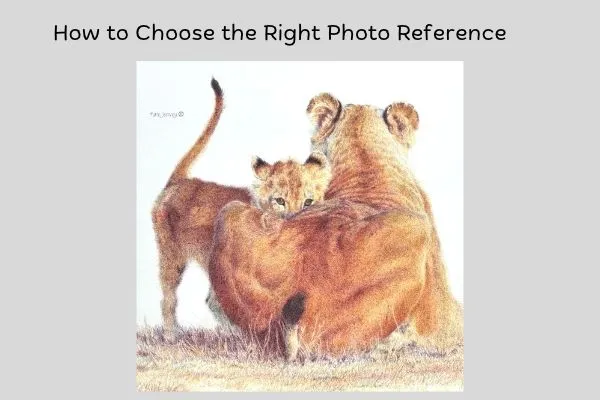
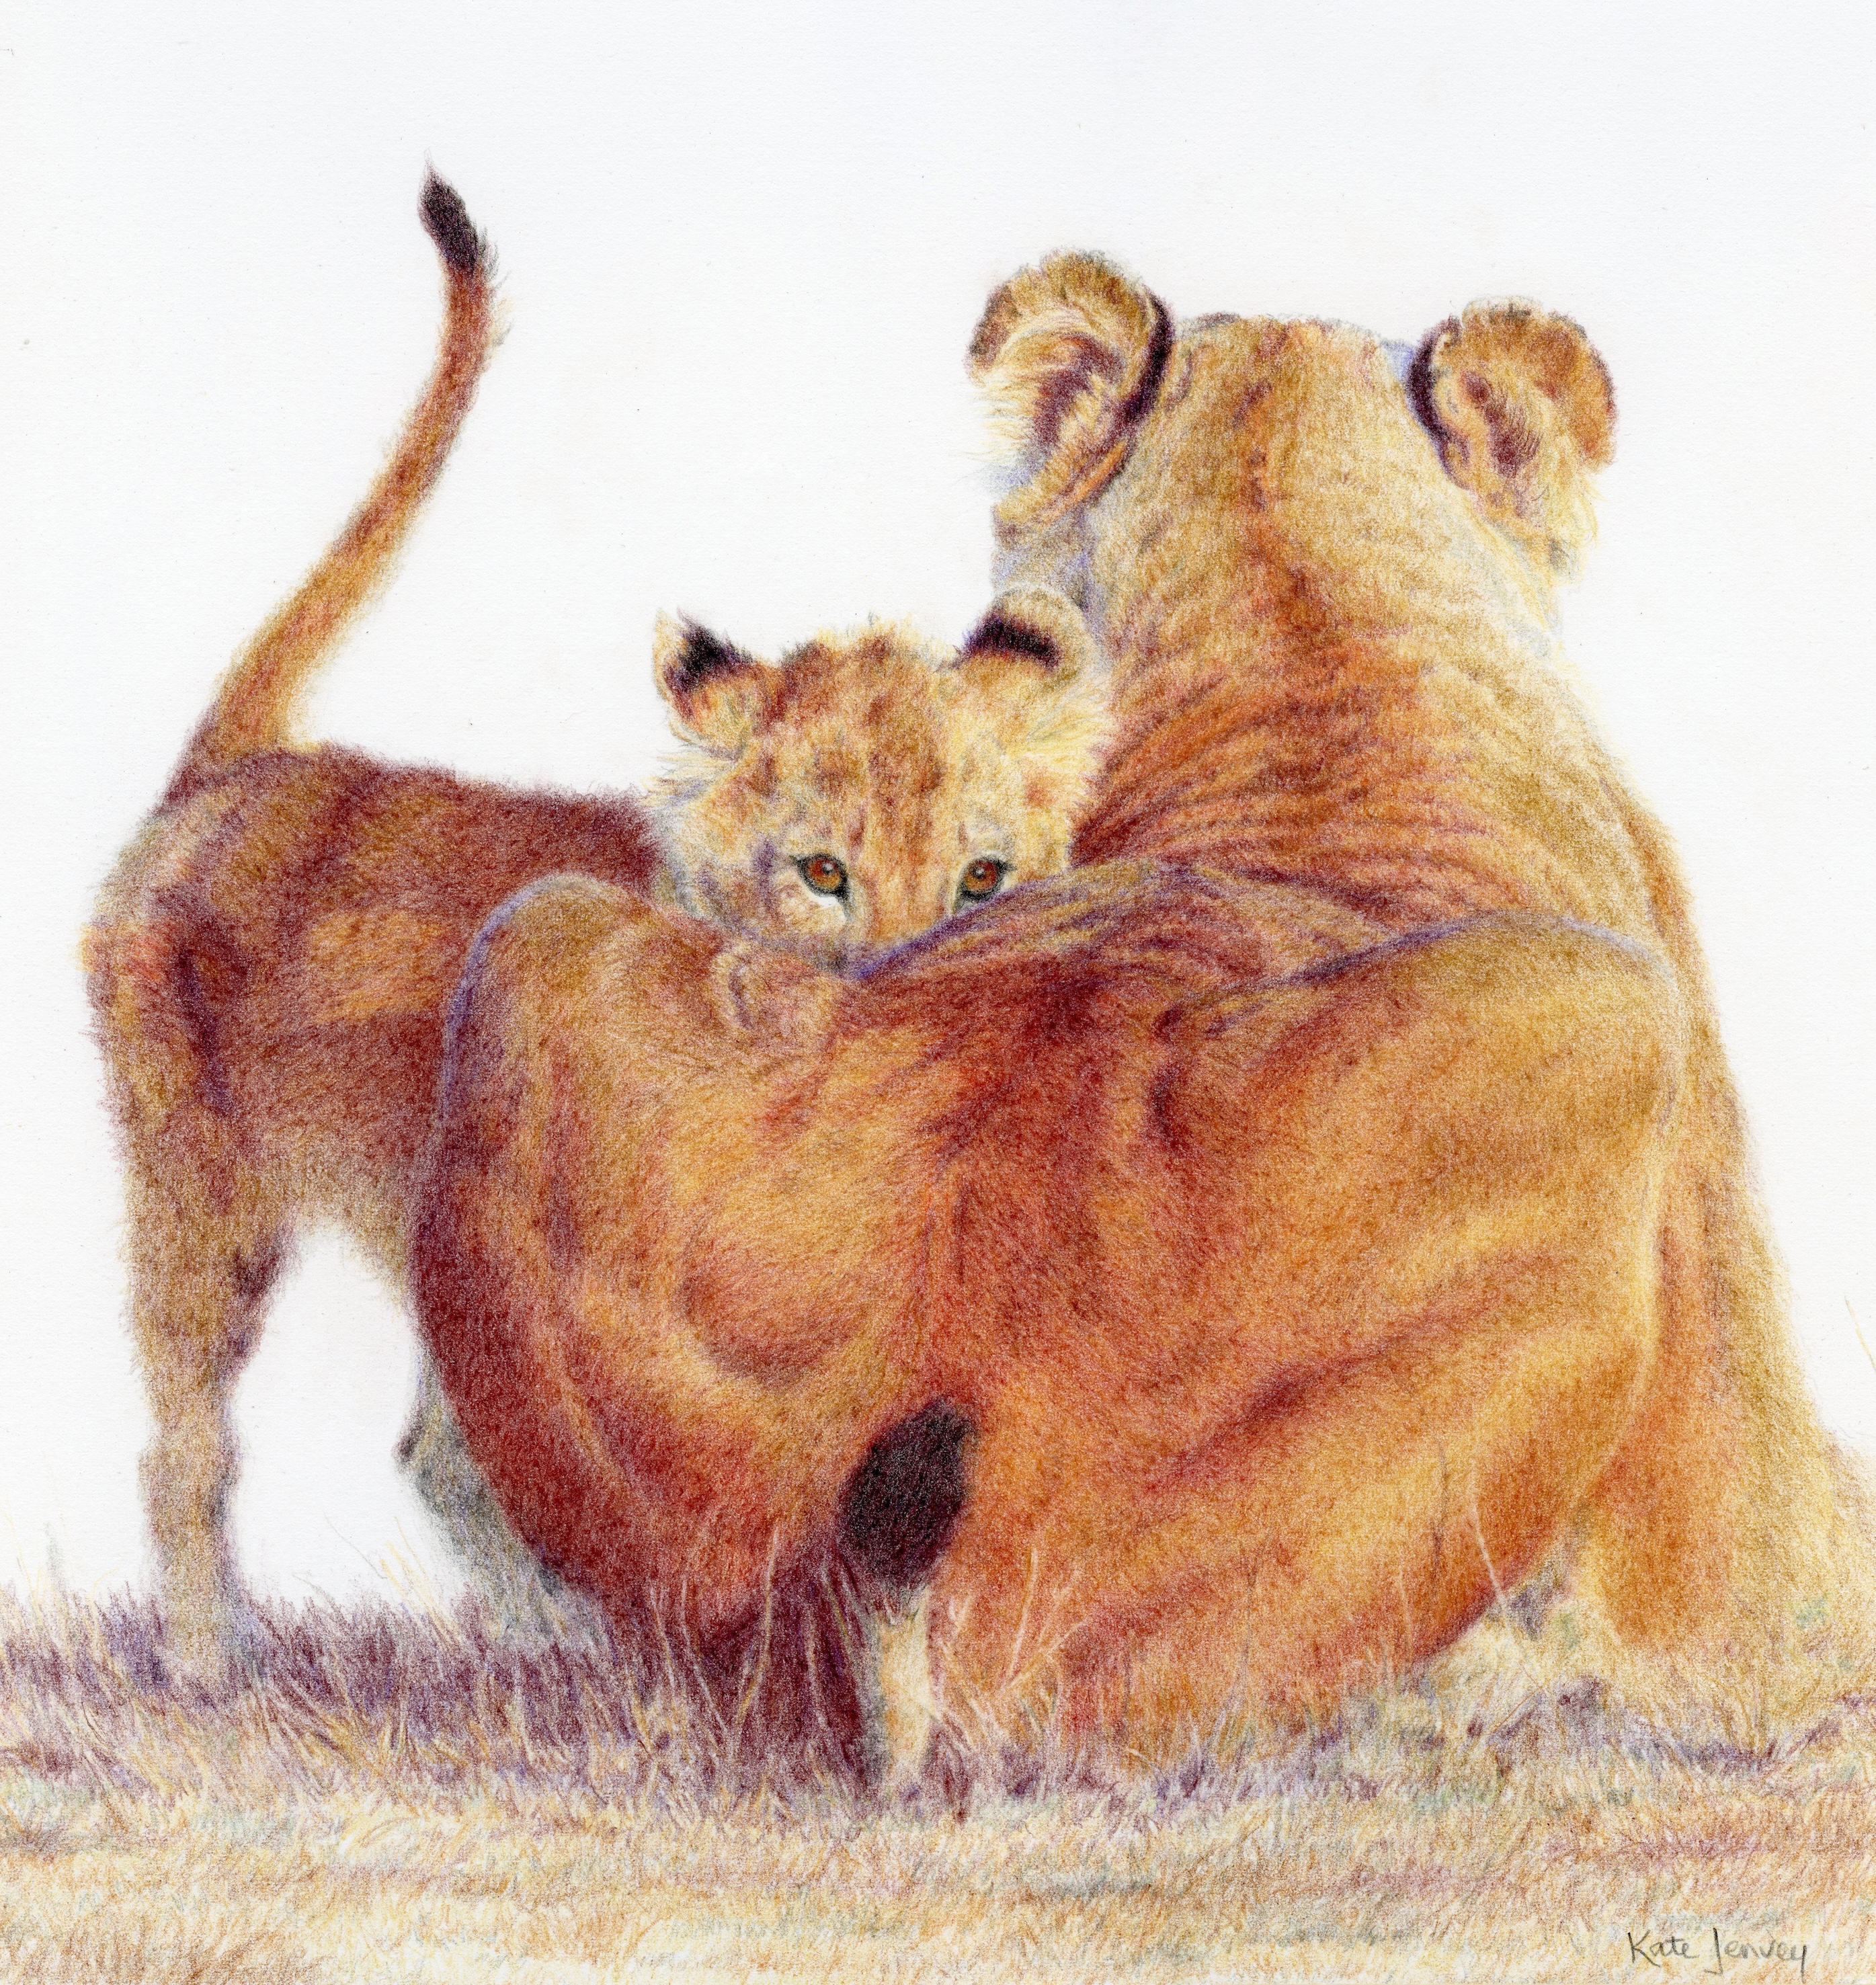
That moment became my coloured pencil drawing, The Warmth of Motherhood.
We explored this topic recently inside ANIMAL ARTISTS ACADEMY, and I wanted to share it here too, because choosing your reference photograph is one of the most important decisions you will make, and it all happens before your pencil ever touches the paper.
Why the reference matters
A good reference photograph gives you clear information about the animal's anatomy and proportions, light and shadow, colour, fur direction and texture, markings, form, and, most of all, its expression and character. A poor reference forces you to guess, and guessing is exhausting. The better the information you have before you begin, the easier it is to make confident decisions as you draw.
Choose a subject that makes your heart sing
If you are drawing something for yourself, and particularly if you are relatively new to drawing, choose a subject you really love. When you feel a connection with the animal, you are far more likely to stay interested through the drawing, be patient when things get challenging, notice the small characteristics that make that animal unique, and enjoy the process rather than just trying to finish.
I had stood there and watched that morning unfold, so I already knew how those lions moved and how tender they were with their cubs. All of that made it into the drawing. If you know and love your subject, you will bring more realism and more character to it.
Choose a reference within your capabilities
It is good to challenge yourself, but there is a difference between stretching your skills and making a drawing unnecessarily difficult. Think about the skills the subject will ask of you.
You may adore elephants, but if you haven't built confidence drawing wrinkles and heavily textured skin, you may find the subject frustrating rather than joyful. That doesn't mean you should avoid difficult subjects forever. Sometimes it's better to develop the skills first and come back to that subject when you are ready.
Is the photograph good enough?
Before committing to a drawing, look carefully at the quality of the photograph and ask yourself:
Is it clear and sharp, and can I see the important details?
Can I see the eyes clearly?
Can I see the direction of the fur or other important textures?
Is there a clear distinction between light and shade, so I can understand the animal's form?
Are important areas disappearing into darkness, or blurred and out of focus?
The more information you can see, the less you have to guess.
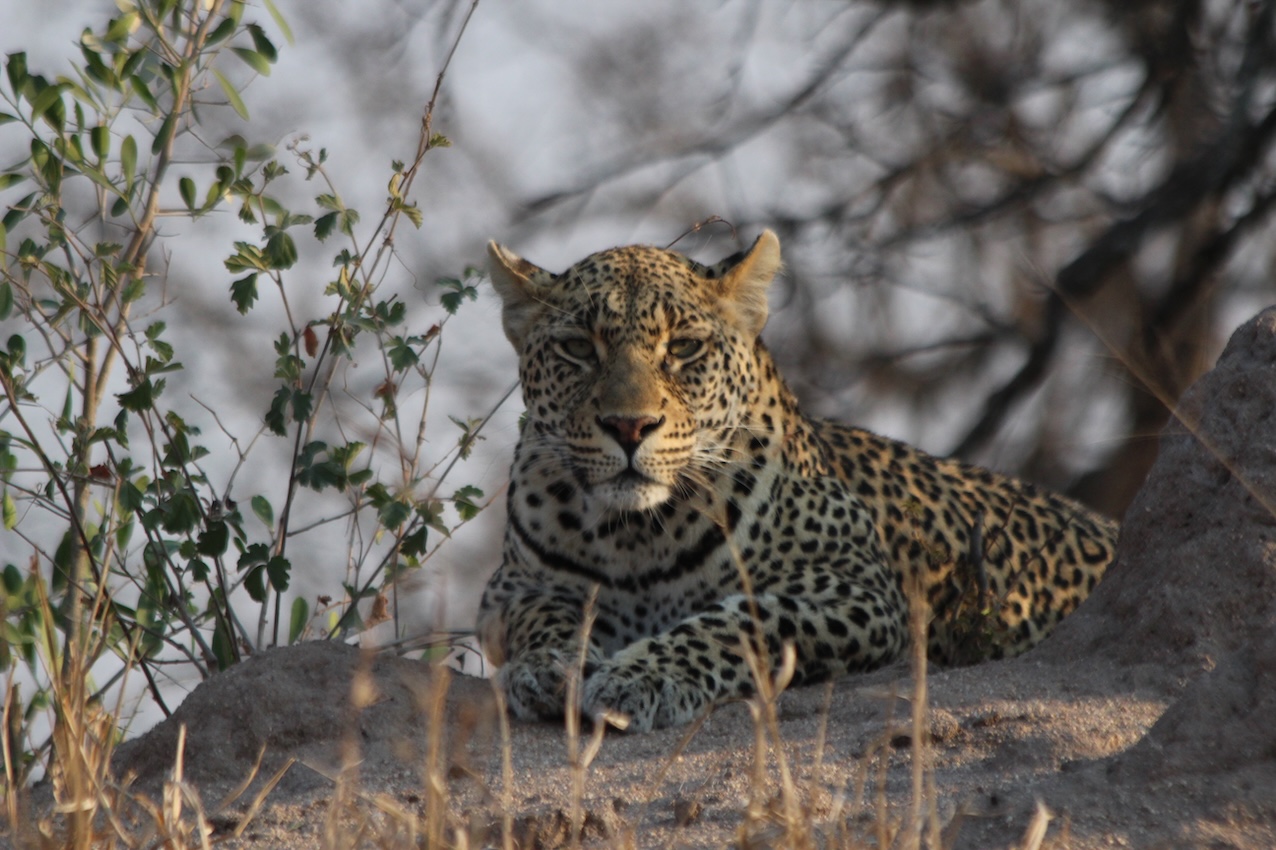
Here is an example of a slightly blurred photo with poor lighting that would make drawing this in pencil and focusing on detail hard work. Also, the leopard herself looks grumpy. Consider how long it takes to create a drawing, and don't add extra hurdles with a less-than-adequate photo reference.
Light and contrast
Good lighting is so important. You want enough contrast between light and shade to help you understand the three-dimensional form of your animal. If everything is evenly lit, the photograph can look flat. If it is too dark, information disappears into the shadows, and if the highlights are overexposed, you lose information there, too.
That early morning sun on safari was a gift. It raked across the lioness's back and shoulders and showed me exactly how her form turned, exactly the kind of information you want.
If you take commissions
If you are drawing an animal for someone else, always sight the photograph before saying yes. Please don't assume you will somehow make a poor photo work. You can spend hours guessing at markings, eye shape, fur direction, anatomy, colour, and light, and it makes the whole drawing much harder than it needs to be.
It really helps to create a simple information sheet for your clients explaining what you need:
Clear, sharp, high-resolution photographs
Good natural lighting where possible
Eyes and important markings clearly visible
No heavy filters or extreme shadows hiding important areas
Several photographs of the animal if possible
Photos taken at eye level for smaller animals
It makes your job easier, and it helps your client understand why the photo matters so much.
Copyright and permission
This is one of the most important things to consider. A photographer owns the copyright to the photographs they take, and finding a photo online does not mean you have permission to use it.
I took my lion photo myself, so I knew I could use it. If someone else took the photograph, think about whether you have permission or an appropriate licence, particularly if your finished artwork will be shared publicly. Privately practising from a photo is quite different from artwork that goes onto social media, a website, into an exhibition or competition, or is sold as an original, print or product.
Some lovely places to find photographs that may be available for use include Pixabay, Pexels, Unsplash, and artist reference photo groups on Facebook set up specifically for sharing. Always check the current licence or group rules first. Google, Pinterest, and Instagram are wonderful for inspiration, but they aren't automatically sources of copyright-free photos. If you find one you love, contact the photographer and ask. Respecting photographers and their work is just as important as expecting others to respect ours.
The photograph is a reference, not a rulebook
This is where my lion photo really comes back in. If I had tried to copy everything in that frame, the drawing would have been about a busy morning on the savanna. Lovely, but not the story that moved me. So I asked myself the question I come back to again and again:
What does this artwork need?
That's much more useful than asking what the photograph contains. The answer was simple. It needed the bond between that mother and her cub, and very little else. So I removed the other lions, let most of the background go, and kept only a soft band of grass to ground them. Everything left in the drawing tells that one story.
You can make these kinds of changes too, whenever they improve your artwork. You might remove unnecessary objects, simplify a busy background, move an element, change colours, change the crop, or soften distracting details. Perhaps a bush directly behind your animal's head makes it look as though it's wearing a fancy headdress! You don't have to draw it there. Move it, simplify it, or leave it out completely. Branches, fences, sheds, rocks and bright objects all deserve the same question: does this add anything to the overall design? If not, consider leaving it out. Simplification is an artistic decision.
Edges and shadows
A camera tends to record many edges as equally sharp, but your artwork doesn't need to treat every edge the same way. Look for places to use hard edges, soft edges and lost edges, areas of strong detail and areas with very little. If every edge is equally sharp, everything competes for attention. In The Warmth of Motherhood, I wanted your eye to go straight to the cub's face, so I kept the grass at the base soft and quiet.
Shadows in photographs can also look very dark and lifeless. Don't automatically reach for black or a very dark grey. Look for subtle colour within the shadows, and consider the surrounding light, reflected colour, and the animal's local colour. Your job isn't to reproduce the darkness the camera recorded; it is to create convincing form.
Here is a short video explaining the colour choices I used in this drawing.
Before you start drawing
Check your reference one final time:
Do I love the subject?
Is it within my capabilities?
Is the photograph clear enough, and is the lighting useful?
Can I see the information I need?
Do I have permission to use the photograph?
Have I considered the crop, and is my focal point clear?
Are there distracting elements I can remove?
A strong artwork begins before the first pencil mark. The photograph gives you the information, but you are the artist, so you make the decisions.
If you would like more guidance on choosing references and turning them into artwork you are proud of, I would love to help you. There is a full course titled ‘What every Animal Artist ought to know about Photographs and Artwork’ included inside ANIMAL ARTISTS ACADEMY, where each month’s workshop is recorded and waiting for you in the members' portal: https://katejenvey.com/animal-artists-academy